
 Yesterday, we talked about using image quotes as a way to get your book-related text out on image-based sites. Today, we’ll go through a very simple method of creating these quote images.
You can make your own image quotes on programs like GIMP (free download), PhotoShop (a paid program), or even PowerPoint. You just need a program that allows you to add a background color and save your document as a JPEG. (You can even use the techniques in this MS Publisher book cover tutorial.) The process is not particularly difficult, so I’m going to offer some barebones instructions on how to do this on Google Drive, which is free, internet-based software available to anyone with a Gmail account.
Step 1. Create a Drawing. To do this, open Google Drive. On the left-hand side you’ll see a red button that says CREATE. Click on that and create a DRAWING (should appear as a choice on a drop down menu). The blank drawing will open (it will be a checkered screen).
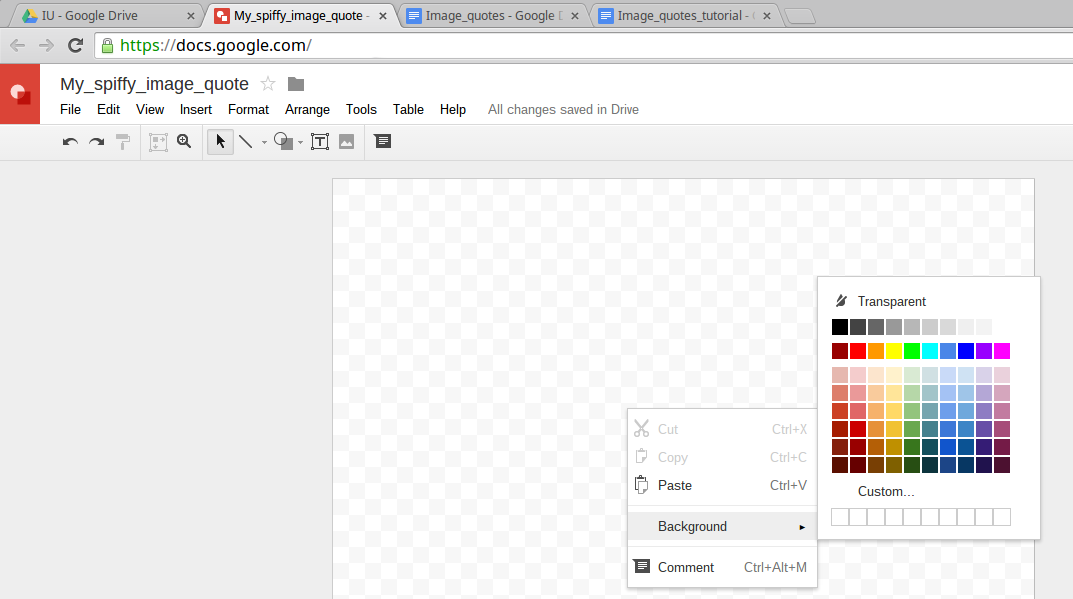
 Step 2. Create a Background. Like I said in the previous post, most backgrounds are just a basic color. You can use an image if you want to, but be careful to choose an image that will not interfere with the legibility of your text. To make a simple background color, right click (for Mac users, CMD-click; for Chromebook users, ALT-click) anywhere on the screen, and a menu will appear. Scroll down to “background” and pick a color. How does it look? Don’t like the color? Right click again, and pick a different background color. If you want to use an image for the background, on the top menu bar, go to Insert>Image and select the image you want from your computer. The imported image might not be the right size. You can either blow up or shrink the image to make it fit the screen. Or you can leave the image alone, follow the remaining steps to place your text over the image, and crop out the dead space after you finish.
 Step 3. Add Your Text. Once your background is set, create a text box (Insert>Textbox), drag it so it’s large enough in size to accommodate your quote, then type or paste your quote. If you paste your text (which I’d advise, so you don’t get typos) and the text looks wonky, don’t panic. Highlight the paste, go to Format>Clear Formatting. That should get rid of anything funky going on. If the clear formatting doesn’t fix the formatting issue, just UNDO your paste and manually type the quote (unfortunately, that’s typically easier than troubleshooting paste formatting issues when it’s such a small amount of text). To avoid formatting issues when you paste, it’s best to copy your text from a plain text document (like a Notepad or TextEdit file).
 Step 4. Fix the Font. After the text is in, check it over for spelling (even if you pasted it). Then highlight the text and change the size so it’s big. How big? Depends on how much text you have. For the example, I had 25 words in my quote, and I made the size 50 points.More words may require a smaller font. Fewer words may merit a larger font. Play around until it looks like an appropriate size to you. To change the font, look at the bar just above the drawing. In the center, you’ll see a drop down box that has fonts in it. You can pick several font styles (Helvetica, Times New Roman, Ubuntu). Next to that box is the font size. You can choose any size between 6 and 96 (you can type in a number, not just select from the drop down menu). You may also alter the color of the text. On the same bar that holds the font size/type boxes is a letter A icon. Click that, and a drop down choice for colors will appear. Pick a color for your text. If you have a dark background, you need a lighter colored text, and vice versa.
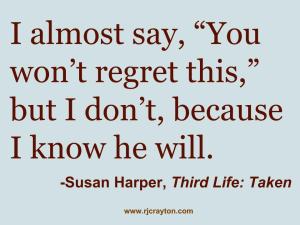
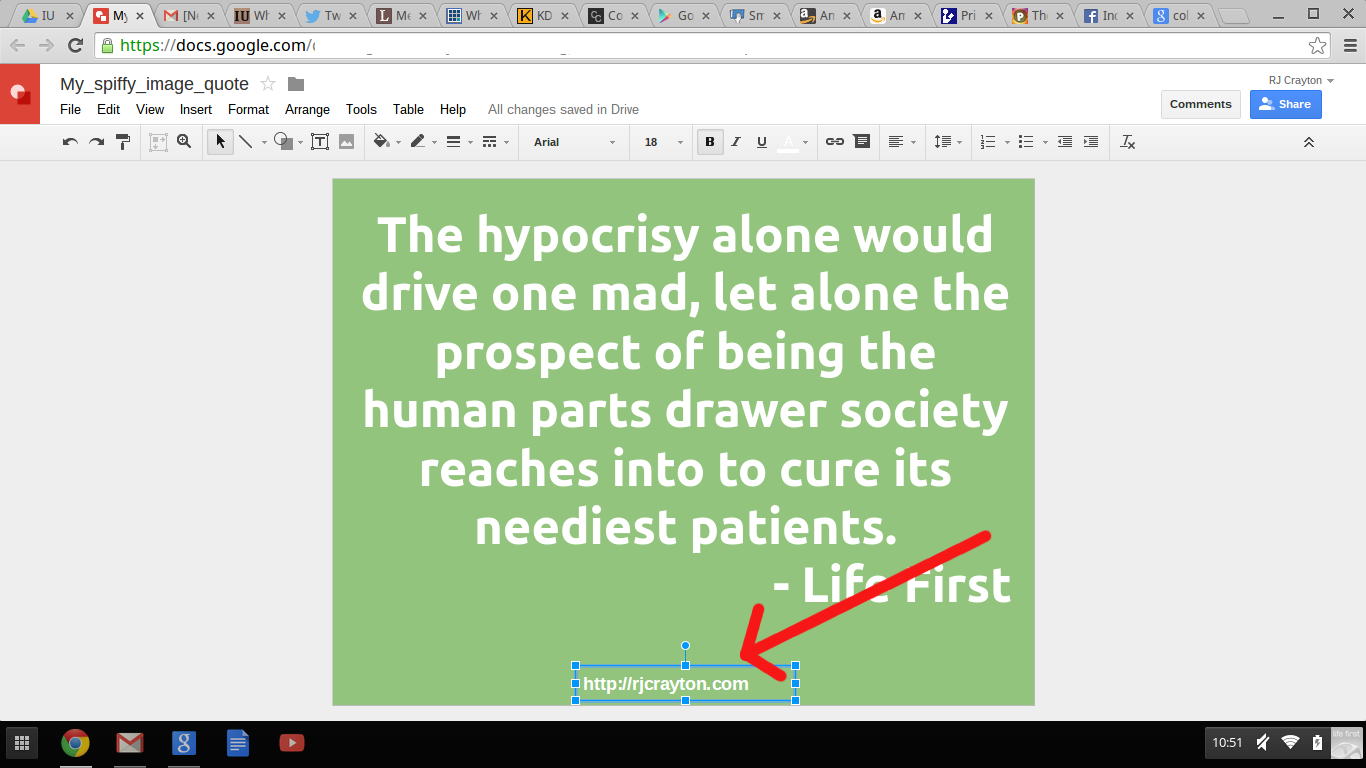
 Step 5. Tag Your Quote. As I mentioned yesterday, one of the wonderful things about images is they get shared, but if your name isn’t somewhere on the image, no one knows you created it. So, create a small text box (using the same method as in Step 3) and type in your website address or author name (the web address is preferred, but if it’s super long, go with your author name). The font for the web address should be smaller, but visible somewhere in the quote image. People typically place the text box along the bottom or side of the image. To move a text box, click on it and drag it where you want it. If you are placing the tag on the side of the image, you’ll probably need to rotate the text box so it is vertical, rather than horizontal. While most tags are on the periphery of the image, I’ve seen some tags placed in the middle of the quote (in a small font size), so people didn’t crop the tag out. I think middle of the quote is overkill, but if you experience problems with people cropping out your tag, it’s an alternative placement option. Like in Step 4, you may need to change the color, font style or font size.
 Step 6. Download Your Quote. Once you’ve finished making your quote (Google automatically saves as you type), go to File>Download As, and select JPG as the file format you want to download your quote in. Once you have your quote image in JPG, you can upload the file to Facebook, Pinterest, Tumblr, Twitter, or any other social network that accepts pictures.
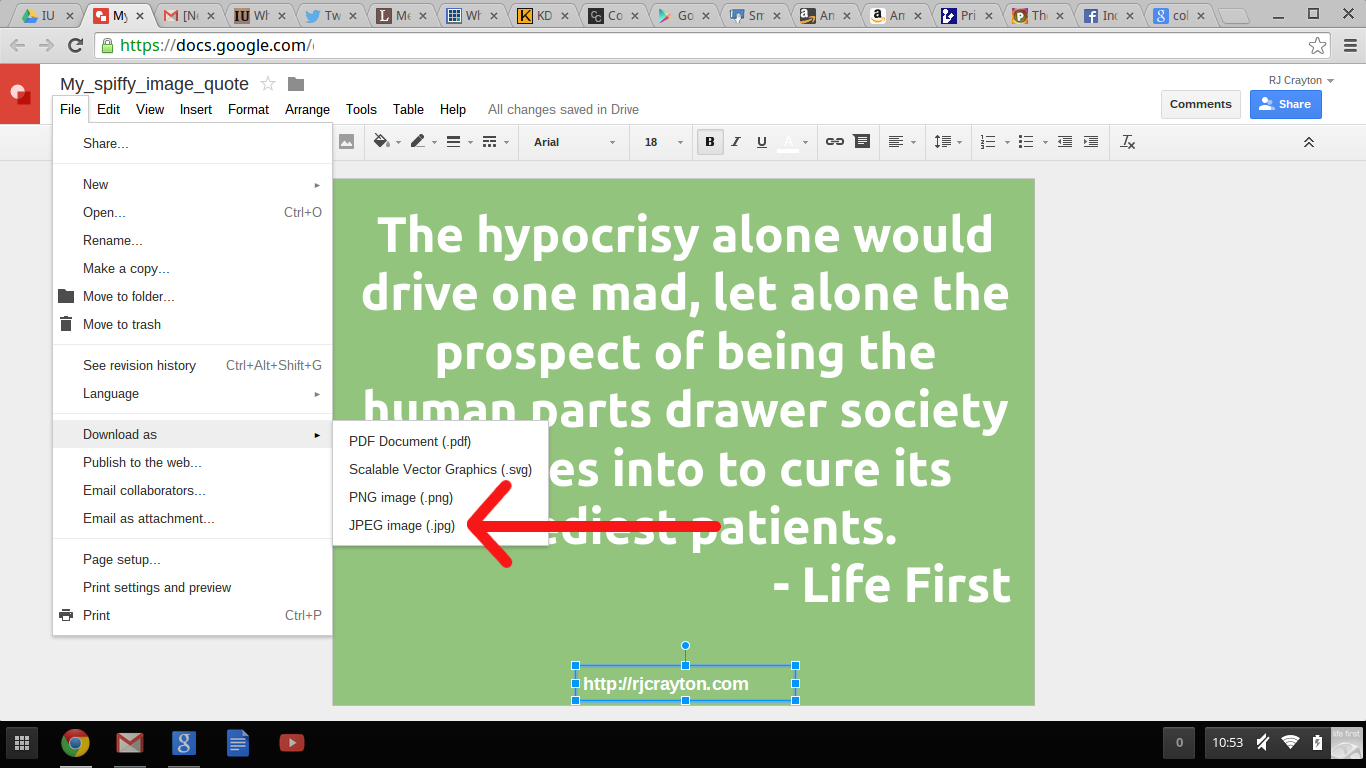
Troubleshooting. So, I mentioned in Step 2 that you could use an image as your background, but that you might have to crop it. While Google Drive’s Drawing program is great for quick, simple creation, it is not a Gimp or Photo Shop. I’d recommend adding your text to the image in the drawing program, then download the entire JPG file to whatever photo editing software came with your computer and crop the dead space from the image using that.
And that’s it. Those are the basics of creating a basic image quote.
I was just going to research this topic tomorrow, so thanks so much for posting this. Fantastic!
Glad it’s helpful to you.
I make image quotes in Paint, which comes for free on Windows.
Paint is a great program, too. As long as it works for you, it’s a good program. I’ve also done image quotes in Gimp.
RJ: Thank you for your time on this.
You’re welcome. Thanks for checking it out.
Thank you! I need to save this. Love posts that help me improve!
I love posts that help me improve, too. Honored that you think mine falls into that category. 🙂
Excellent, RJ, thank you very much.
Thanks a bunch, RJ. I’ve been wondering how to do this. Looks good and easy even for me. 🙂
This tutorial worked like a charm, RJ! Thank you!