
 Last month’s article was a tutorial on how to make a video trailer with Windows Movie Maker (WMM). Today we will cover adding music to and finalizing your video.
Lots of sites offer royalty-free music (and images) that you can use for your video trailer. You can find out more about these on the Indies Unlimited Video Trailer resource page. I used Incompetech to download royalty free music for my six book trailers. Kevin MacLeod has done an excellent job structuring that site to help find the type of music you are looking for. You can easily play music there before downloading. Once you click on the download, it places the music on your computer. Kevin doesn’t charge for the music, but donations are certainly appreciated!
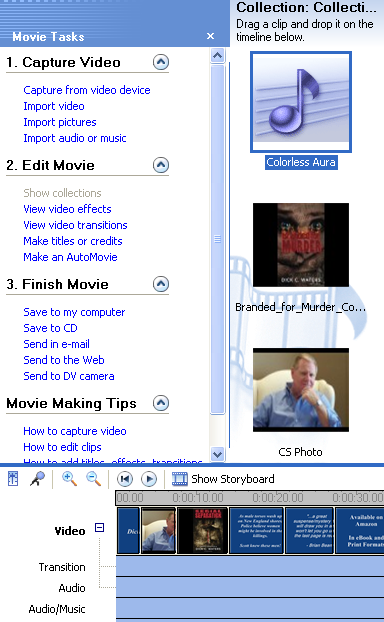
Go to your project by opening Windows MovieMaker. You should see the screen below for a project in process.
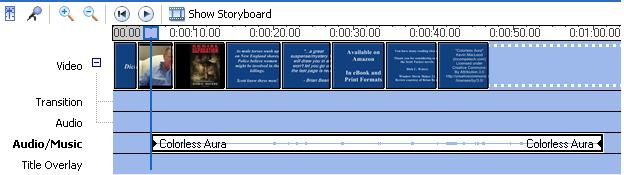
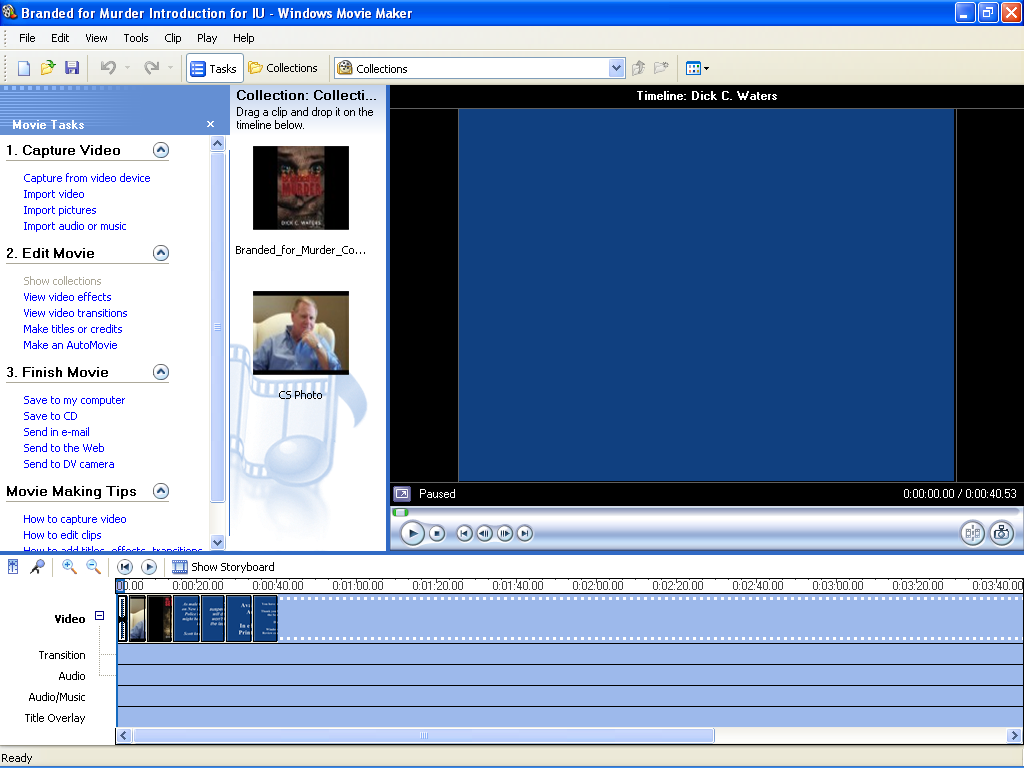 When you look at the thumbnail frames listed to the right of the Video line, they are very compressed. To enlarge them, go to the row that has “Video” and click on it. Then click on “Zoom In” until you see those thumbnails large enough to work with. I clicked it twice to get this result.

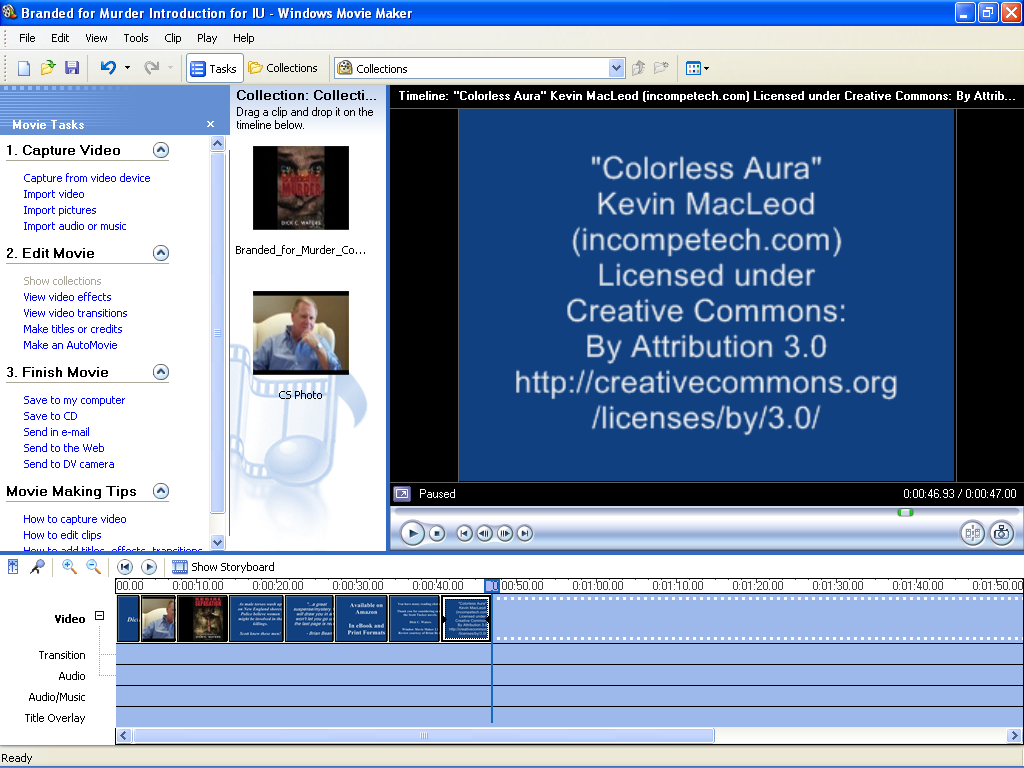
Now, let’s add a slide to acknowledge the music license. Click on the last slide in your video.
 Then under Movie Tasks, click on Make Titles or Credits.
 On the next screen, click on “Title after the Selected Clip.” I copied the words from the file I saved while on the Incompetech site, and pasted them on that new slide. Always check to make sure all of the text shows, as there is a limit to the number of characters.
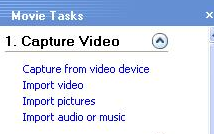
 The next step is to add the downloaded music to your existing video. Click on “Import Audio or Music” under section “Capture Video.”
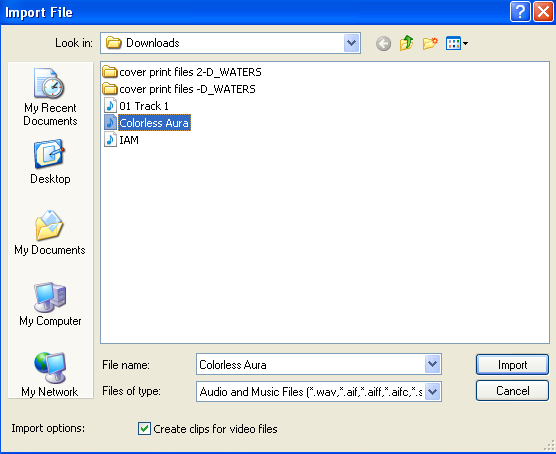
When you click on that it should take you over to your “Download” directory on your computer. Click on the name of the music you downloaded, and then click the “Import” box.
The music will be added to your “Collection” area.
Now left click on that thumbnail and drag it down to the row labeled “Audio/Music.”
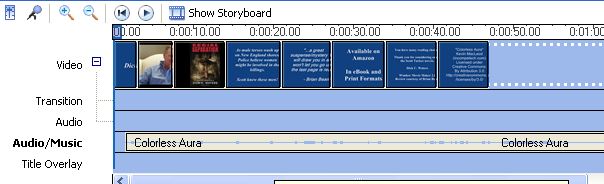
The music is now in your video. Please make sure to save your work at this point.
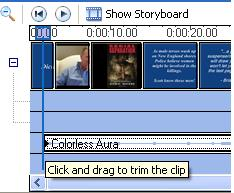
My music exceeds the length of the slides in my video (note how it goes past the last of my slides). Yours will most likely too. In order to cut down your music to match your slides, it will be necessary to play your video to note where you want your music to start and stop.
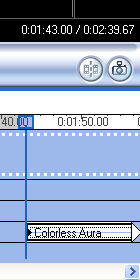
Double click on your music line. When you do that, the video start point will jump to the music start point. Now press the play button. That will show you the total video time. In mine it was 02:38:67, which is almost three minutes. You want to be prepared to write down potential music start points. It might take a few repetitions to find a good starting point. After several plays, I noted where I wanted my music to start – 01:42:88. 
Once you have noted your music start point/time, pause the music and then click on your music line. When you move your mouse over the beginning of your music, it will give you red arrows to select the start point (those arrows did not show when I copied the image).
As you click and drag those arrows to the right, pay attention to the time showing in the display area at the bottom of the bigger screen. I got it to 01:43, which is close the starting time I noted above.
Next, click on your music line until it turns blue. Once it does, move the music bar so it lines up under your slides.
You will most likely need to do that same process for the music end point. Click on the music line, position your mouse to the end point until you get the red arrows, and then move the music border left to end under the slide where you want the music to stop.
You can now play your video and adjust the music as you need to. You have not lost what you trimmed; just repeat the trim step to add or shorten the beginning or end.
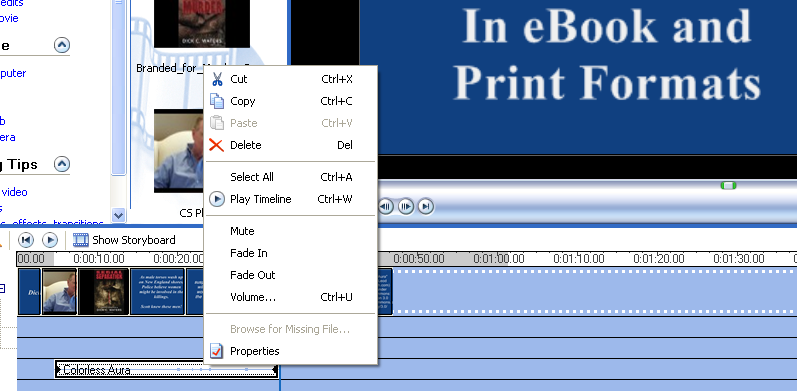
Now you might want to fade your music in and out. Right click on your music line, and a pop-up screen will appear. Click on “Fade In” and then click on “Fade Out.” This gradually brings the music in, and of course fades it out at the end.
Don’t forget to save your work. Play with your video until you are happy with all of the screens, transitions and music timing. When you are done, save your project again.
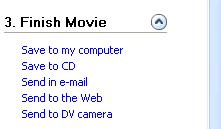
Finish your actual video by selecting “Save to my computer” under “Finish Movie.”
It will take a few minutes to compile your finished video. Select play to see your final product. If you need to change something, you can easily go back into your project file.
Now you need to present it to the world!
Youtube is just one of many sites that allow for upload of video trailers (you can see more in the article entitled Building Your Video Empire). Here’s my completed video for Serial Separation, which is the second novel in my Scott Tucker series.
Have fun with this process, YOU can do this.
Wonderful information – thank you!
Thanks you. My pleasure Melinda.
Great info!. Thank you.
Thanks Phillip.
Video editing is just one of the many hats we don as indies. Thanks for the tutorial, Dick. 🙂
My personal preference is to lay in the music track first. Then I add the shots in my video, lengthening or shortening their time on the screen so that the photos change at specific points in the music — key changes, musical downbeats and climaxes, etc.
Thanks Lynne. That is excellent advice. I can see the benefits of doing that. I’m still learning this task.
If I’m putting slides to a radio show, I’ll put the audio first. Otherwise, I tend to put the frames first, I have no idea why.
Thanks Kat